This layout was so much fun!! I got to use lots of flowers and pink, which I normally stay away from since I scrap mostly pictures of my son. This picture is from last year when we were in Florida. We go to the same place pretty much every year, since I was about 10. I get so excited bringing my son back to this place and sharing my memories with him of when I was a child and my parents would bring me and my brother here. This picture was taken at the St. Pete Pier. When I was younger i remember it seemed much bigger then it is to me right now. Back to the layout, I used my Cameo to cut out the doily at the top and the bottom left hand corner, then I glimmer misted them both. I glimmer misted all of the flowers (not included in the kit, from my stash), and for the little pink ones, I stamped on them, because i wanted to give them some more depth and interest. I placed flat back pearls in the centers of all the flowers (from my stash). I used some Studio Calico Veneer Birds (not included in the kit), and I stamped a feather design on them to also give them some interest and depth. Love the way this layout turned out!!
Monday, July 9, 2012
A few So Cal Layouts
I am just loving the Studio Calico monthly kits, June was the first month that I joined the monthly subscription kit club, and they really do make an amazing kit. Here is a layout that I made with my very first kit So Cal:
Friday, June 15, 2012
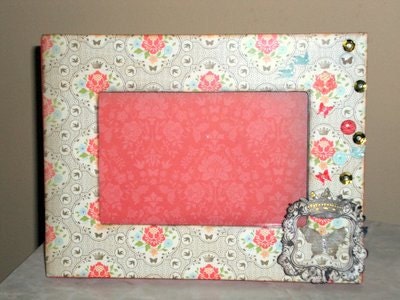
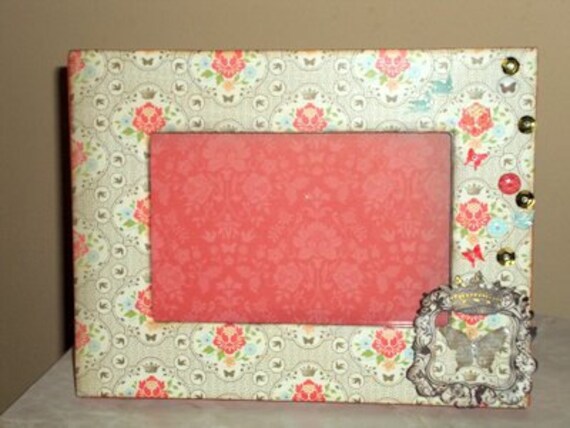
Frame 4 x 6 Butterfly Bird Shabby Shic
Here is another boring Target frame that I altered and is now so fun and elegant. I love the paper collection by Stampin Up! called Everyday Enchantment Paper, it is actually a Sale-A-Bration item that was from this past year. The collection is just gorgeous!! One of my favorite Stampin Up! collections yet.
The first thing I did was paint the frame with Modern Red acrylic paint by Claudine Hellmuth, I painted the back and the sides, since the front will be covered with designer paper. Then I adhered the designer paper using Multi Medium. I then distressed the edges of the frame with Tim Holtz distress ink Next, I used Claudine Hellmuth Multi Medium over the front, back and sides of the frame, so that it is protected from, dust, dirt, etc. I am a big fan of stamping and then fussy cutting images and then propping them up on foam dots. I think it adds so much detail to the project. I used a Stamp set for the main piece of the frame that was also part of Sale-A-Bration
I am a big fan of stamping and then fussy cutting images and then propping them up on foam dots. I love to fussy cut paper as well, i just think it adds so much detail to the project.
Let me know if you have any questions!!
Hugs!!
Thursday, March 29, 2012
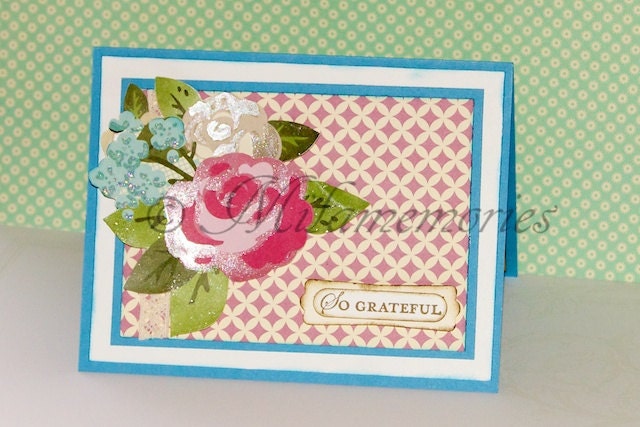
Thank You Pink Flower Card So Grateful
List of Items Used:
-Stampin Up! Patterned Paper
-Frost White Shimmer Paint by Stampin Up (#116854)
-Aqua Painter by Stampin Up (#103954)
-Tim Holtz Rock Candy Distress Stickles
-Modern Label Punch by Stampin Up (#119849)
-Word Window Punch by Stampin Up (#119857)
-Marina Mist Cardstock by Stampin Up (#119682)
I fussy cut some flowers and leaves from the collection, then i used my Aqua Painter (#103954) and some Frost White Shimmer Paint (#116854) to accent parts of the flowers and leaves. I wanted certain parts of the piece to stand out even more, so I took some Tim Holtz Distress Rock Candy Stickles and accented some of the parts on the blue flowers and the leaves. It is so gorgeous in person!! I then took a strip of lace (#118480) by Stampin Up! and adhered it down behind the flower. Then i took one of my new favorite stamps
| Apothecary Art - Clear-Mount Stamp #125527 (shown below) for the sentiment. |
Please feel free to let me know if you have any questions. This card is for sale in my Etsy Shop.
Hugs,
Mila
Wednesday, March 28, 2012
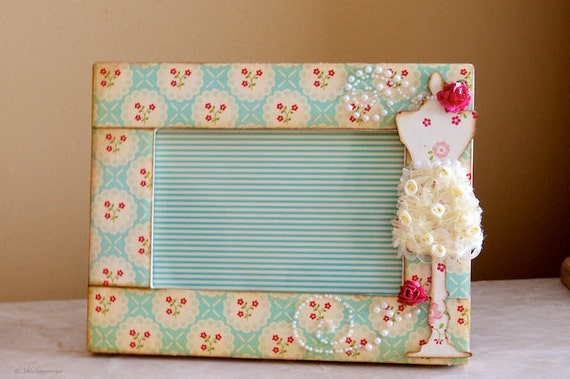
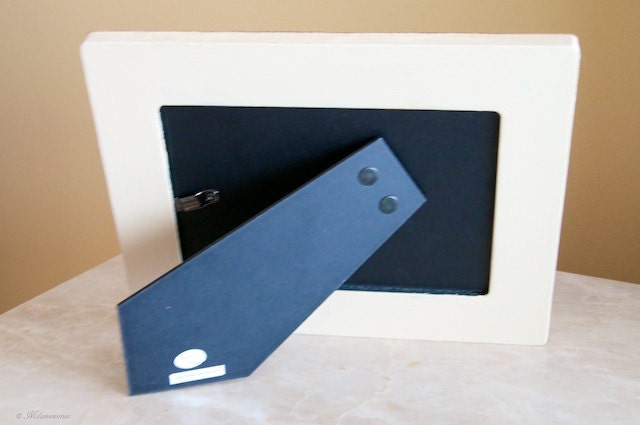
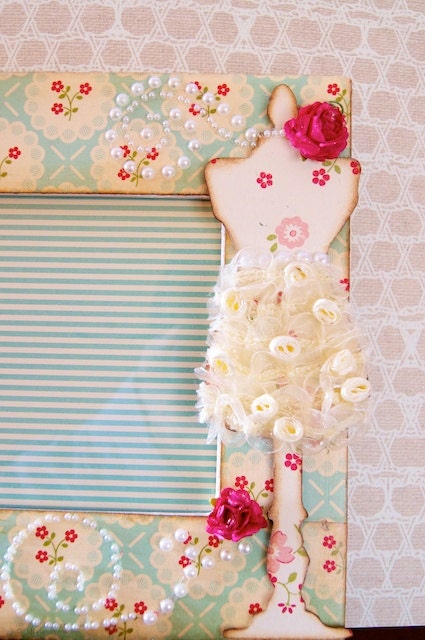
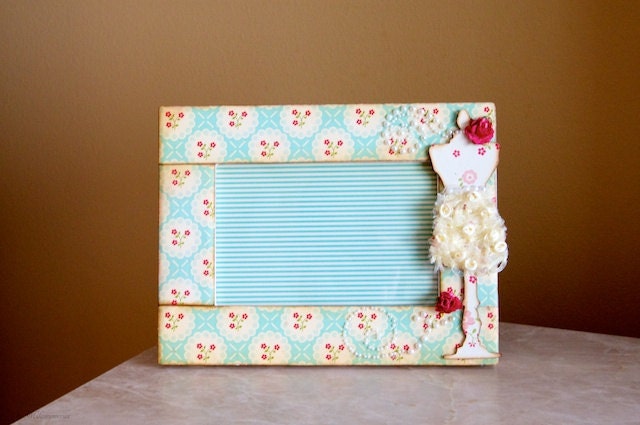
Frame 4 x 6 Dress Form Pearl Flower Trim Shabby Shic
This frame was so fun to make! I got some frames from Target and decided i was going to alter them, because they were just to plain for my taste. I was so excited to use some October Afternoon Thrift Shop Paper. I really love this collection, it is an older collection, but i just couldn't find the perfect project to use it on. When i was thinking about what to do for a frame, i was going through my papers and as soon as I saw this paper I was inspired to use it with the Tim Holtz Dress Form Die.
Let me know if you have any questions, I will have a video on it sometime later this week.
| After I adhered the paper onto the frame, I used a multi medium by Claudine Hellmuth over the paper and the painted part of the frame, I did this so that it would be protected from dirt, dust, etc. Then i took my dress form die by Tim Holtz and cut it out with my Sizzix Big Shot. I used another pattern paper to cover the dress form and by multi medium over that as well, I took some gorgeous flower lace by Prima and wrapped it around the bottom so that it looks like a skirt, and put some Stampin Up pearls right above that to make it look like a belt. I also used some pearls around the neck part to make it look like a necklace and added a rose by IAMROSES (#R2-15). The roses are actually white, but I colored them in with some Glimmer Mist. I love to use the white roses, because then i can just color them whichever color calls for the project I am working on. Of course, nothing can be claimed as finished without some Prima pearls. |
Hope you like the frame, let me know if you have any questions. The frame is for sale in my etsy shop.
Come back tomorrow for a new frame I altered using some Stampin Up papers!!
Hugs,
Mila
Friday, December 30, 2011
Happy New Year!!!
Happy New Year everyone (well it will be tomorrow night)!! I am so excited for the New Year to come, this past year has kind of been a rough one for me. I have been doing a lot of crafting over the holidays!! I have been trying to keep up with my December Daily, I got behind a few days, but I am catching up now, it is really great to be able to print my pictures right at home, it has helped me to keep up with it more. I am hoping to be able to share my December Daily with you guys in the next few days. It has been so much fun doing the December Daily this year, I have so much planned for the next few months, I have mini albums planned, one for my son when he was just born using Graphic 45 paper line, then I want to do a family mini album using Bo Bunny Timeless paper line, and I want to do a recipe mini album with all of my grandmothers hand written recipes in it. Plus I have so many other ideas going on in my head, I am hoping to come out with at least a video a week this year starting this January 3, I was thinking about posting a video every Monday, since Monday's are always the hardest day of the week, it will be nice to post a fun video to have a pick me up :)
Anyway, that is enough rambling from me!! Talk to you guys next year!!
Hugs,
Mila
Anyway, that is enough rambling from me!! Talk to you guys next year!!
Hugs,
Mila
Friday, December 9, 2011
Welcome to the Christmas 2011 Blog Hop!!!!
If you've just happened to come across my blog please check out each of the super talented ladies blogs below. There will be some fun prizes along the way, AND there will be some AWESOME ideas!
Have fun and thank you for attending our blog hop.
I am so excited to share a few projects that I have been working on!! Many more to come throughout the weeks. I have been so busy working on my December Daily this year (first time attempting this) and I am actually keeping up, so excited, trying to keep it simple. I am working on a video showing what I am doing with my December Daily, I am hoping to have that up sometime next week. How many are attempting the December Daily this year? So far, i have found that keeping it simple is really working for me, I don't stress if I can't work on the page for that day, I do make sure that I journal quick notes through out the day and take a picture, so then I can just work on it the next day or over the weekend. I have a simple format for each day, a little spot for journaling and then above that goes my picture, I will show you guys everything next week, can't wait to share that with you. Now to my projects below:


![]() |
| Add caption |
Again thank you for visiting with me and now please make sure that you stop by Sheila at http://shesasassylady.blogspot.com/
- Pam - http://www.thebugbytes.com/
- Jeannie - http://nonnasscraps.blogspot.com/
- Jen - http://3catsandabug.blogspot.com/
- Carole - http://www.onmycraftroomwall.blogspot.com/
- Lisa Brooks - http://thejourneyoflisaslife.blogspot.com
- Audrey - http://cuteandsome.blogspot.com/
- Mila - http://milamemories.blogspot.com/
- Sheila aka sassylady - http://shesasassylady.blogspot.com/
- Elizabeth - http://217creations.blogspot.com/
- Kelly Millet - http://www.kamscraftyplace.blogspot.com
- Dayna Sabrina - http://www.sabrioletdesigns.blogspot.com/
- Lori - http://www.scrappinmystressaway.blogspot.com
- Denine Vajja - http://pumpkinspiceblog.blogspot.com/
- Melissa - www.melissamade2.blogspot.com
- Allison - http://goodybagdiva.blogspot.com/
Labels:
Christmas,
Frames,
Graphic 45,
Holidays,
Stampin Up
Friday, October 21, 2011
Fall / Halloween Blog Hop
Welcome to Milamemories in the ...Fall / Halloween Blog Hop!
If you've just happened to come across my blog please check out each of the super talented ladies blogs below. There will be some fun prizes along the way, AND there will be some AWESOME ideas!
Have fun and thank you for attending our blog hop.
I am so excited this Halloween because this is the first year that my son is actually dressing up and is excited about it!!! The past years, he has wanted nothing to do with Halloween, so this past weekend we were at the store looking at costumes and he saw this one. I asked him if he would wear it for Halloween and he was so excited and said yes!!! Later that night i had some friends over and he could not wait to show everyone his costume, I just had to take a picture of him showing off and being all excited about it!!
I used a sketch from http://sketchythursdays.blogspot.com/, I started off with a 12 x 12 piece of patterned paper, then took another piece of 12 x 12 patterned paper in orange and tore the top and bottom ends off, about a 1/2" - 1" from each end. Then i took some black lace and placed it underneath the orange paper. I then cut an 8" x 8" piece of Stampin Up card-stock and distressed it with some Tim Holtz inks in Dusty Concord and Orange Marmalade, i used those colors to distress the edges of the torn paper as well as the note sheet that i did my journaling on. I then took some Glimmer Mist in Pearl and sprayed each sheet of cardstock along with my journaling sheet to give it an awesome shimmery effect. It also blended the distress work a bit more and makes it look smoother. I cut out the Caution sign with Cricut, and of course no layout could be complete without some Prima bling and flowers (yes even for boys LOL)!! Such a super simple and quick layout!! I love using sketches!! Please feel free to let me know if you have any questions!!
Again thank you for visiting with me and now please make sure that you stop by Dayna at http://sabrioletdesigns.blogspot.com/
Here is the complete blog list!!
Jen from http://3catsandabug.blogspot.com/
Lori from www.scrappinmystressaway.blogspot.com
Jeannie from http://nonnasscraps.blogspot.com/
Audrey from http://cuteandsome.blogspot.com/
Kymberlee from http://www.thepapermidwife.com/
Allison from http://goodybagdiva.blogspot.com/
Kelly from http://www.kamscraftyplace.blogspot.com
Debbie from http://debseclecticthoughts.blogspot.com/
Carole from http://www.onmycraftroomwall.blogspot.com/
Kate from http://sassyandscrappykate.blogspot.com/
Amylynne from http://www.amysscrappyspace.blogspot.com
Mila - M& M from http://milamemories.blogspot.com/
Dayna Sabrina from http://sabrioletdesigns.blogspot.com/
Elizabeth from http://www.217creations.com/
If you've just happened to come across my blog please check out each of the super talented ladies blogs below. There will be some fun prizes along the way, AND there will be some AWESOME ideas!
Have fun and thank you for attending our blog hop.
I am so excited this Halloween because this is the first year that my son is actually dressing up and is excited about it!!! The past years, he has wanted nothing to do with Halloween, so this past weekend we were at the store looking at costumes and he saw this one. I asked him if he would wear it for Halloween and he was so excited and said yes!!! Later that night i had some friends over and he could not wait to show everyone his costume, I just had to take a picture of him showing off and being all excited about it!!
I used a sketch from http://sketchythursdays.blogspot.com/, I started off with a 12 x 12 piece of patterned paper, then took another piece of 12 x 12 patterned paper in orange and tore the top and bottom ends off, about a 1/2" - 1" from each end. Then i took some black lace and placed it underneath the orange paper. I then cut an 8" x 8" piece of Stampin Up card-stock and distressed it with some Tim Holtz inks in Dusty Concord and Orange Marmalade, i used those colors to distress the edges of the torn paper as well as the note sheet that i did my journaling on. I then took some Glimmer Mist in Pearl and sprayed each sheet of cardstock along with my journaling sheet to give it an awesome shimmery effect. It also blended the distress work a bit more and makes it look smoother. I cut out the Caution sign with Cricut, and of course no layout could be complete without some Prima bling and flowers (yes even for boys LOL)!! Such a super simple and quick layout!! I love using sketches!! Please feel free to let me know if you have any questions!!
Again thank you for visiting with me and now please make sure that you stop by Dayna at http://sabrioletdesigns.blogspot.com/
Here is the complete blog list!!
Jen from http://3catsandabug.blogspot.com/
Lori from www.scrappinmystressaway.blogspot.com
Jeannie from http://nonnasscraps.blogspot.com/
Audrey from http://cuteandsome.blogspot.com/
Kymberlee from http://www.thepapermidwife.com/
Allison from http://goodybagdiva.blogspot.com/
Kelly from http://www.kamscraftyplace.blogspot.com
Debbie from http://debseclecticthoughts.blogspot.com/
Carole from http://www.onmycraftroomwall.blogspot.com/
Kate from http://sassyandscrappykate.blogspot.com/
Amylynne from http://www.amysscrappyspace.blogspot.com
Mila - M& M from http://milamemories.blogspot.com/
Dayna Sabrina from http://sabrioletdesigns.blogspot.com/
Elizabeth from http://www.217creations.com/
Subscribe to:
Posts (Atom)